Section I: Introduction
A. Why Passport Applications Matter
Passport applications are not merely bureaucratic processes; they are the keys to unlocking a world of adventures and opportunities. They are your tickets to exploring new cultures, making unforgettable memories, and broadening your horizons. Whether you’re planning an exotic vacation, studying abroad, or taking a business trip, a valid passport is a fundamental requirement.
Your passport is not just a travel document; it’s a symbol of your identity as a citizen of your country. It represents your nationality and serves as a vital proof of your legal status when you’re abroad. More than that, it’s a tangible reminder of your freedom to traverse international borders, a privilege that many around the world aspire to but may not have.
B. The Simplicity of the Process
Now, you might be wondering, “Is the passport application process complicated?”. The answer is a no. The passport application process, when broken down into its various steps, is straightforward. With the right guidance and a bit of patience, anyone can successfully complete it.
In this article, we will demystify the passport application process, ensuring you feel confident and well-prepared to embark on this essential journey. From gathering the required documents to submitting your application and tracking its progress, we’ve got you covered every step of the way.
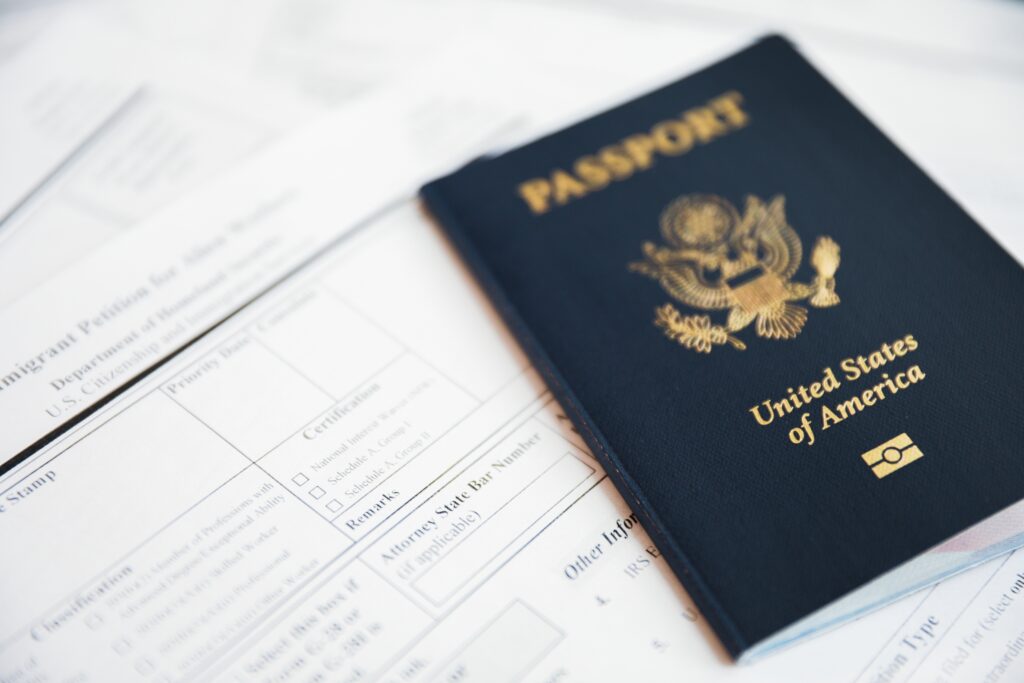
C. The Role of Passport Paperwork and Instructions
While we often think about the passport itself as the core of the application, it’s crucial not to overlook the significance of the accompanying paperwork and instructions. These documents provide the necessary guidance to ensure your application is complete and error-free.
Interestingly, the instructions for filling out your passport application and assembling the required documents are not typically provided by common places where you might go for your passport photo. However, with the convenience of modern technology, you can access these essential passport instructions right from your phone, making the process even more accessible.
In the next sections, we’ll delve into the specifics of the passport application process, emphasizing the importance of understanding and following the provided instructions. You’ll discover that applying for or renewing your passport is a manageable experience, setting the stage for your next exciting journey.
D. When to Renew Your Passport
Renew your U.S. passport when it has about nine months of validity left. This helps meet the six-month validity requirement for many countries and avoids expedited processing fees and stress. Even without immediate travel plans, a valid passport is essential for unexpected situations. Check your passport’s physical condition, as damage can affect its validity. Passport processing times vary, so plan ahead to avoid last-minute rushes. If your name has changed, update your passport to reflect your current legal name. Be proactive in renewing your passport, ensuring readiness for international travel.
Section II: Getting Started
A. Gather Required Documents
Before you dive into the passport application process, it’s essential to ensure you have all the necessary documents at your fingertips. Gathering these documents ahead of time will streamline the process and help you avoid any last-minute hassles.
- Proof of Citizenship: This is typically your birth certificate if you’re a U.S. citizen by birth. If you’ve become a citizen through other means, you’ll need to provide the relevant documentation, such as a naturalization certificate.
- Proof of Identity: A government-issued photo ID, such as a driver’s license or a previously issued passport, serves as proof of your identity.
- Passport Photos: You’ll need two identical passport-sized photos. These photos must meet specific requirements, such as size, background color, and facial expression. We’ll delve deeper into this in the next part.
- Passport Application Form: The U.S. Department of State provides multiple forms, which you’ll need to complete. Be sure to fill it out the correct form, accurately. Common forms used are DS-11, DS-82
- Fees: Prepare the required fees for your passport application. These fees vary depending on factors like your age and the type of service you require (standard processing or expedited).
B. Documents Related to Name Change
If you are changing your name on your passport due to reasons such as marriage, divorce, or legal name change, you will need to provide specific documents to support the name change. Here are the common documents you may need:
- Marriage Certificate: If you are changing your name due to marriage, you will typically need to provide a certified copy of your marriage certificate as evidence of your name change. This document should show both your old name and your new name.
- Divorce Decree: If you are reverting to your previous name after a divorce, you may need to provide a copy of your divorce decree that specifies the name change.
- Court Order: If you are changing your name for reasons other than marriage or divorce, you may need to provide a court order that legally authorizes the name change.
By having these documents ready, you’ll breeze through the initial stages of your passport application. Remember, being well-prepared sets the tone for a smooth and stress-free experience.
C. Complete the Passport Application Form
The passport application form is your gateway to obtaining or renewing your passport. This form collects essential information about you, your identity, and your travel plans. Filling it out accurately and honestly is crucial for a successful application.
To make this process as straightforward as possible, consider these tips:
- Use Black Ink: Complete the form in black ink to ensure clarity and legibility.
- Follow the Instructions: Pay close attention to the instructions provided with the form. They will guide you through each section, helping you avoid errors.
- Proofread: Before submitting your application, review it carefully for any mistakes or omissions. Simple errors can cause delays in processing.
D. Which US Passport Form?
The U.S. Department of State offers various passport application forms to accommodate different circumstances and needs. Here are some of the most common U.S. passport application forms:
- DS-11: Application for a U.S. Passport (New, Minor, or Renewal): The DS-11 form is used for first-time applicants, minors under the age of 16, and individuals renewing their passport who do not meet certain criteria for using the DS-82 form (described below).
- DS-82: U.S. Passport Renewal Application for Eligible Individuals: Eligible U.S. citizens can use this form to renew their passport by mail. To use the DS-82 form, your previous passport must have been issued when you were 16 years of age or older, within the last 15 years, and be in good condition.
- DS-5504: Application for a U.S. Passport – Name Change, Data Correction, and Limited Passport Book Replacement: Form DS-5504 is used to apply for a name change, correct a printing error, or replace a limited-validity passport (e.g., a limited validity due to being issued for a specific emergency or expedited reason).
- DS-3053: Statement of Consent: Issuance of a U.S. Passport to a Minor Under Age 16: This form is used when one parent or guardian cannot be present with a minor under 16 years old applying for a passport, and the absent parent or guardian is required to provide consent.
- DS-86: Statement of Non-Receipt of a U.S. Passport: Use this form if you applied for a U.S. passport but did not receive it within a reasonable time frame, and you believe it was lost or stolen in the mail.
- DS-5525: Statement of Exigent/Special Family Circumstances – For Issuance of a U.S. Passport to a Minor Under Age 16: This form is used in cases of special family circumstances when a parent or guardian cannot provide the required consent for a minor’s passport.
- DS-64: Statement Regarding Lost or Stolen Passport: If your U.S. passport has been lost or stolen, this form should be filled out to report the loss or theft.
- DS-60: Affidavit Regarding a Change of Name: This form is used to provide additional evidence or information about a name change when applying for a U.S. passport.
- DS-4085: Application for Additional Visa Pages or Miscellaneous Passport Services: If you need to add extra visa pages to your passport or request other miscellaneous passport services, you can use this form.
It’s essential to select the appropriate form based on your specific situation and follow the instructions provided on the U.S. Department of State’s website or by the passport acceptance facility where you plan to submit your application. Each form has its unique purpose, and using the correct one will help streamline the application process.
E. Prepare Passport Photos
Passport photos might seem like a minor detail, but they are a critical component of your application. Properly taken and correctly formatted photos are essential to ensure your passport is processed without any hitches.
Here’s what you need to know about passport photos:
- Size and Quality: Passport photos must be 2×2 inches in size and printed on high-quality photo paper. The background should be plain white or off-white, and the image should be clear and sharp.
- Facial Expression: Maintain a neutral expression with both eyes open. Avoid smiling or frowning, as the goal is to have a clear image of your face.
- Attire: Dress in normal street attire for your photo. Uniforms, hats, and dark glasses (unless required for medical reasons) are generally not allowed.
- Hair and Head Coverings: If you wear a head covering for religious reasons, make sure it doesn’t obscure your face, and your full face is visible from the bottom of your chin to the top of your forehead.
With your required documents gathered, the form filled out accurately, and your passport photos in hand, you’re well on your way to completing the initial steps of the passport application process. These preparations will set you up for a hassle-free journey through the process of obtaining or renewing your passport.
Section III: Submitting Your Application
A. Choose the Right Acceptance Facility
Now that you’ve gathered all your required documents, filled out the application form, and ensured your passport photos are in order, it’s time to submit your passport application. One of the first decisions you’ll need to make is selecting the right acceptance facility for your application.
Acceptance facilities are typically located in post offices, libraries, clerks of court offices, and other government buildings. To find the nearest acceptance facility, you can use the U.S. Department of State’s online facility locator tool. It’s important to choose a facility that is convenient for you, as you’ll need to appear in person to submit your application.
When visiting the acceptance facility, remember to bring the following:
- Your completed passport application form.
- Proof of citizenship (such as your birth certificate or naturalization certificate).
- Proof of identity (government-issued photo ID).
- Passport photos.
- Any supporting documents related to your name change, if applicable.
- Payment for the passport fees.
The acceptance facility staff will review your documents, witness your signature, and ensure everything is in order before forwarding your application for processing. It’s advisable to call ahead and make an appointment if the facility allows, as this can help reduce your wait time.
B. Pay the Applicable Fees
Passport applications are not entirely fee-free, so it’s essential to understand the cost structure and be prepared to pay the applicable fees. The fees can vary depending on several factors, including your age and the type of service you require:
- Passport Book: This is the standard passport for most international travel. The fee for an adult (age 16 and older) passport book is typically higher than that for a child’s passport.
- Passport Card: If you need a more portable and wallet-sized option for land and sea travel between the U.S. and Canada, Mexico, the Caribbean, or Bermuda, you can apply for a passport card, which is often cheaper than a passport book.
- Expedited Service: If you need your passport in a hurry, expedited processing is available for an additional fee.
You can find the most up-to-date fee information on the official U.S. Department of State website. Payment is usually accepted in the form of a personal check, money order, or credit card. Keep in mind that the execution fee, charged by the acceptance facility, is separate from the application fee and should be paid directly to the facility.
C. Submit Your Application
Submitting Your Passport Application in Person
When submitting your passport application in person, you engage directly with a designated acceptance facility, which could be a local post office, public library, or government office. This approach offers several advantages. Firstly, it allows for immediate verification of your documents, ensuring that everything is in order. An acceptance agent will meticulously review your application, supporting documents, and passport photos to make sure they meet the strict criteria set by the U.S. Department of State. This in-person verification process minimizes the likelihood of errors or omissions, reducing the chances of processing delays.
Furthermore, submitting your passport application in person provides a valuable opportunity to ask questions and seek clarifications on the spot. The acceptance facility staff can offer guidance and advice, especially if you have specific circumstances like a name change or require expedited processing. Additionally, if there are any issues with your application, they can often be resolved promptly, ensuring a smoother application experience. Finally, by visiting an acceptance facility, you can take care of the required execution fee, which is separate from the application fee, and submit payment directly. Overall, submitting your passport application in person offers a hands-on, efficient, and reassuring experience.
Submitting Your Passport Application via Mail
Submitting your passport application via mail offers a convenient option, especially for those who meet specific eligibility criteria. If you’re renewing an adult passport and your previous passport meets certain conditions, you can utilize the DS-82 form to apply by mail. This method allows you to complete your application from the comfort of your home and mail it to the designated processing center. While it may lack the immediate face-to-face interaction of an acceptance facility, it provides a straightforward and efficient way to renew your passport.
One of the main advantages of mailing your application is that it often results in a shorter wait time compared to applying in person, as there is typically less processing involved. It can be a particularly attractive option for those who have busy schedules and may find it challenging to visit an acceptance facility during regular business hours. However, it’s crucial to follow the provided instructions meticulously, ensuring that you enclose all required documents, passport photos, and fees, and that your application form is correctly filled out. Additionally, be mindful of the processing times, as these may vary depending on factors like the time of year and any expedited services you may request. Submitting your passport application via mail offers a practical and efficient solution for eligible applicants, making the renewal process relatively straightforward and accessible.
Section IV: Waiting Period
A. Processing Time
After you’ve submitted your passport application, it’s natural to be eager to receive your passport and start planning your travel adventures. However, it’s important to understand that there is a processing period during which your application will be reviewed, verified, and your new passport will be issued. The processing time can vary depending on several factors:
- Routine Processing: In normal circumstances, the standard processing time for a U.S. passport is typically 2 to 3 months. This timeframe may be longer during peak travel seasons or if there is an exceptionally high volume of applications.
- Expedited Processing: If you need your passport more urgently, you can request expedited processing for an additional fee. This usually reduces the processing time to about 2 months, although it can still vary.
It’s crucial to plan ahead and apply for your passport well in advance of your intended travel date to avoid any last-minute complications or stress. Keep in mind that processing times can change, so it’s a good idea to check the current estimated processing times on the U.S. Department of State’s official website.
B. Tracking Your Application
While waiting for your passport to arrive, you can track the status of your application to stay informed about its progress. Here’s how:
- Online Tracking: Visit the U.S. Department of State’s official website and use the “Check Passport Application Status” tool. You’ll need to provide your last name, date of birth, and the last four digits of your Social Security number.
- Contact the National Passport Information Center: You can also contact the National Passport Information Center for updates on your application. They can provide information on the status of your passport and any potential issues or delays.
Remember that it’s essential to remain patient during the waiting period. While it can be tempting to check your application status frequently, processing times can vary, and some applications may take longer than others. If you’ve requested expedited processing, you can generally expect to receive your passport more quickly.
As you eagerly await the arrival of your new passport, use this time to plan your upcoming adventures. Whether it’s an international vacation, a study abroad program, or a business trip. Your passport is the key that will open doors to exciting opportunities around the world. Before you know it, you’ll be ready to embark on your next journey.
Section V: Passport Arrival
A. Receiving Your Passport
The moment you’ve been patiently waiting for has finally arrived – your passport is ready!
- Check the Envelope: Your passport will typically arrive in a large envelope, which may also contain your supporting documents, such as your previous passport or any name change documents. Carefully open the envelope and ensure all documents are present and in good condition.
- Review Your Passport: Take a close look at your new passport. Verify that all the information, including your name, date of birth, and photo, is accurate and matches your expectations.
- Passport Expiration Date: Take note of your passport’s expiration date. Many countries require that your passport be valid for at least six months beyond your planned departure date, so it’s essential to stay aware of this date as you plan your travels.
If you notice any errors or discrepancies in your passport, contact the U.S. Department of State immediately for guidance on how to correct them. Timely action can prevent travel complications down the road.
B. Plan Your Next Adventure
With your new passport in hand, the world is at your feet, waiting to be explored. It’s the perfect time to start planning your next adventure, whether it’s a dream vacation, a study abroad program, or a business trip. Your passport is the gateway to incredible experiences, and it empowers you to connect with people and cultures from around the globe.
As you embark on your journeys, remember to keep your passport safe and secure. It’s a valuable document that should be protected at all times. Consider investing in a passport holder or a travel wallet to keep it organized and protected during your travels.
Your new passport represents endless possibilities and countless adventures. Cherish it, protect it, and use it to create memories that will last a lifetime. Whether you’re a seasoned traveler or setting off on your first international adventure, your passport is your trusty companion on the road to discovery.
Section VI: Conclusion
A. The Journey Begins with a Passport
In conclusion, we’ve embarked on a comprehensive journey through the passport application and renewal process, demystifying what can often seem like a complex task. We’ve learned that a passport is not just a travel document; it’s a symbol of identity, freedom, and opportunity. It opens doors to cultures, experiences, and connections that enrich our lives.
The simplicity of the process, when broken down into manageable steps, is evident. With the right documents, careful attention to detail, and a bit of patience, anyone can navigate the passport application journey. It’s a journey that begins with the desire to explore and grow. Your passport is your first step towards that adventure.
B. Embracing the World with Confidence
As you hold your new passport in hand, you’re not just holding a booklet of pages; you’re holding the promise of incredible journeys, cultural immersion, and personal growth. Your passport is your ticket to becoming a global citizen, someone who embraces the world with confidence and curiosity.
We encourage you to take that first step, whether it’s planning a vacation, embarking on a study abroad adventure, or pursuing international business opportunities. Use your passport as a tool to explore the world’s wonders, and to make memories that will last a lifetime.
As you navigate the globe with your passport as your trusty companion. Remember that each stamp, each visa, and each adventure adds to the rich tapestry of your life story. So, seize the opportunity, explore the unknown, and let your passport be your guide to a world of limitless possibilities. Your journey has just begun.